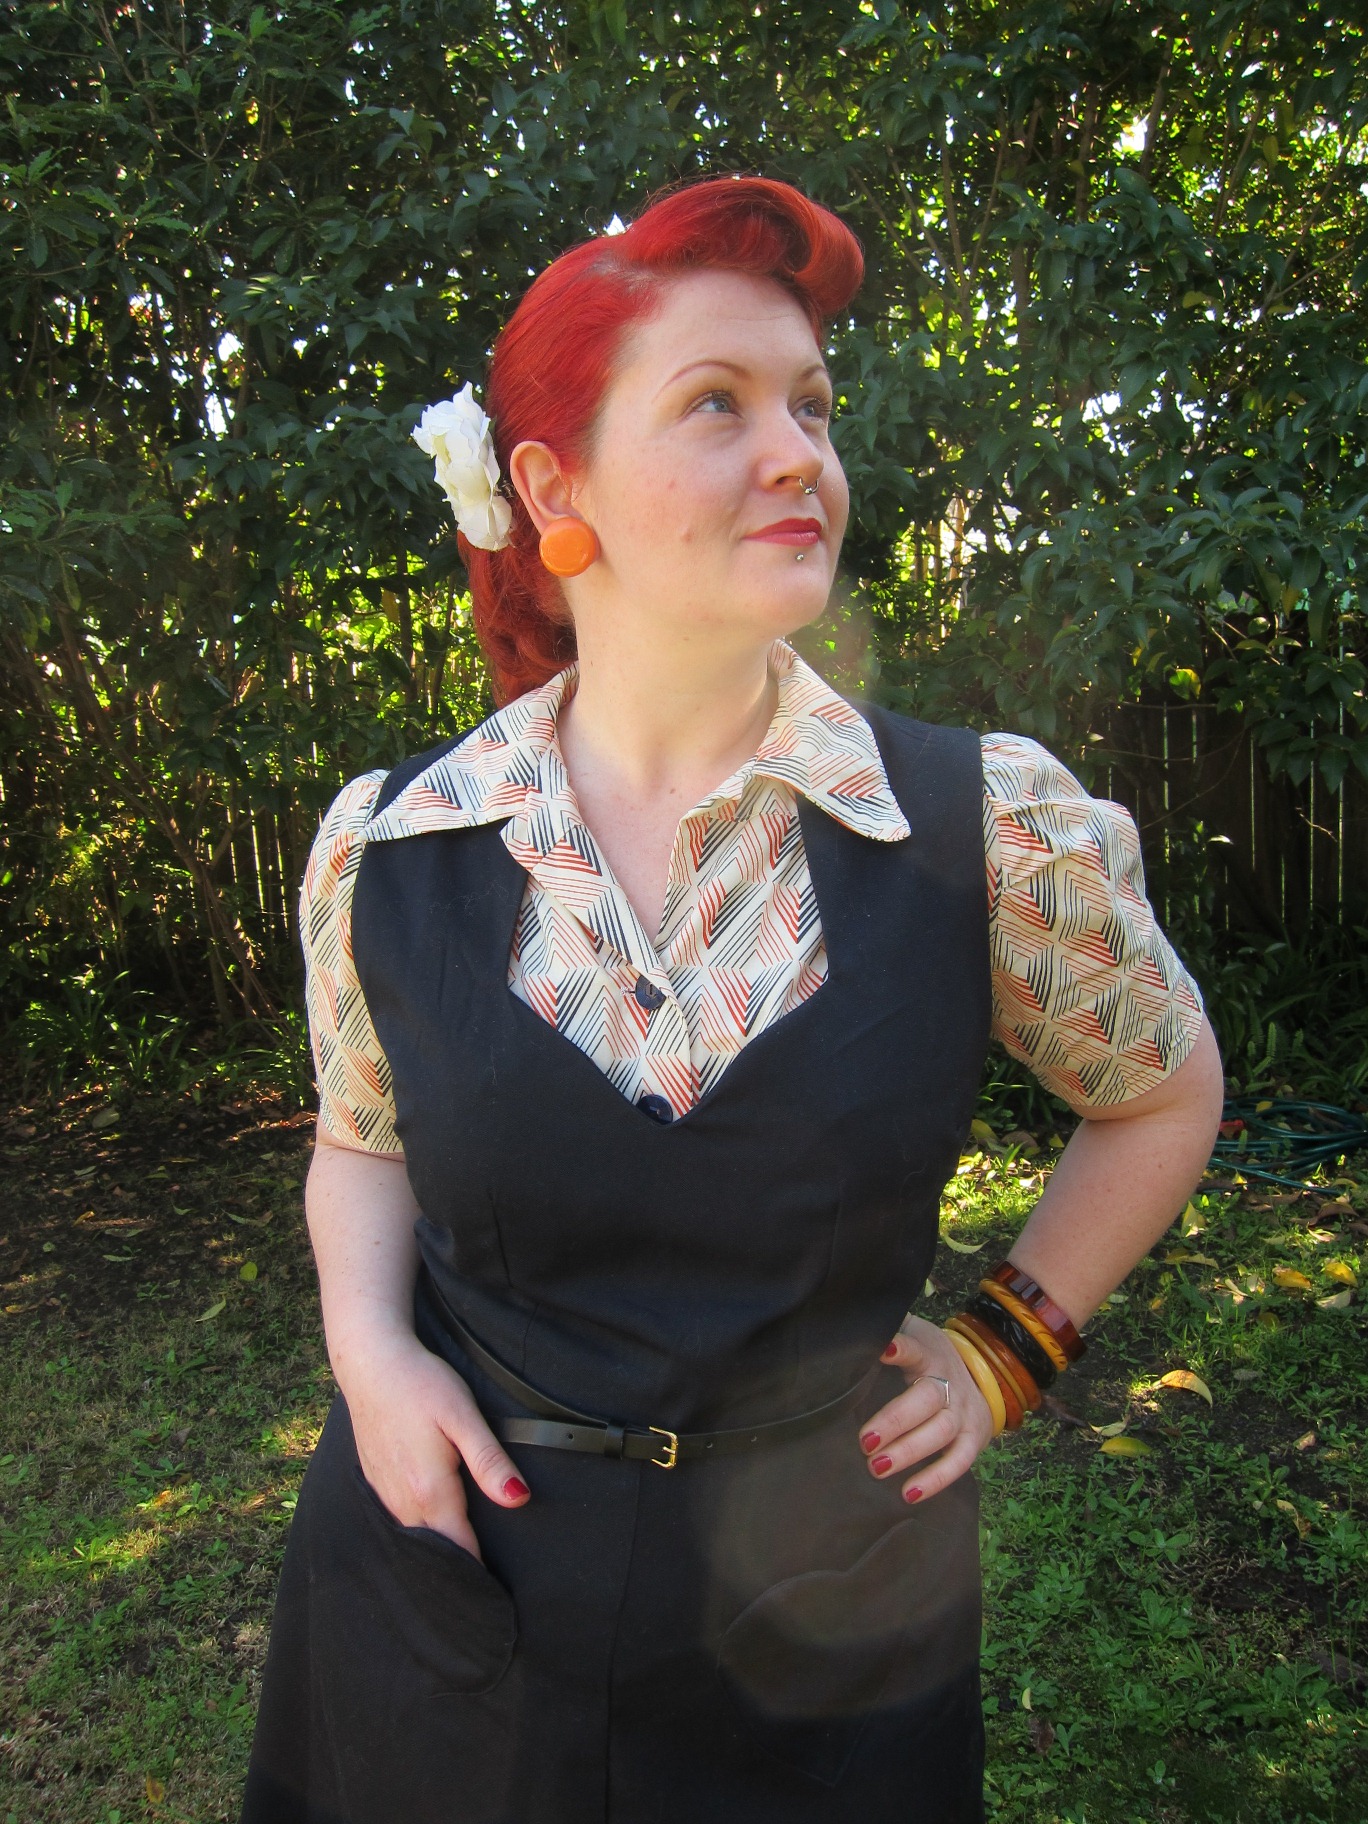
My favourite, go-to shirt pattern has to be 'Smooth Sailing' from Wearing History.
![]()
![]()
I have used the pattern a whopping ten times - so often, that I don't even blog about them anymore! It always works, looks flattering and doesn't take a lot of fabric.
![]()
![]()
But how about some changes for something interesting? Over the few weeks, I'll share some easy pattern variations I've made - including a 1940's pocket design and full length bishop sleeves.
But first - changing an existing sleeve to a full Puffy Sleeve is very easy - and I'll show you my quick and dirty way to do it!
![]()
![]()
The Smooth Sailing (SS) sleeve is gathered (puffed) at the top, and fitted around the bicep. My variation is slightly different by also being puffed around the bicep, and gathered into a sleeve band.
I'm actually following the steps here, View C from Dress Design, Draping and Flat Pattern Making by Hillhouse and Mansfield (circa 1948) - right click to embiggen in a new tab:
![]()
![]()
(I'm going to assume that you already know how to sew and are comfortable with basic pattern adjustments).
The SS sleeve already has the puffiness allowance at the top, so we only need to add it to the bottom.
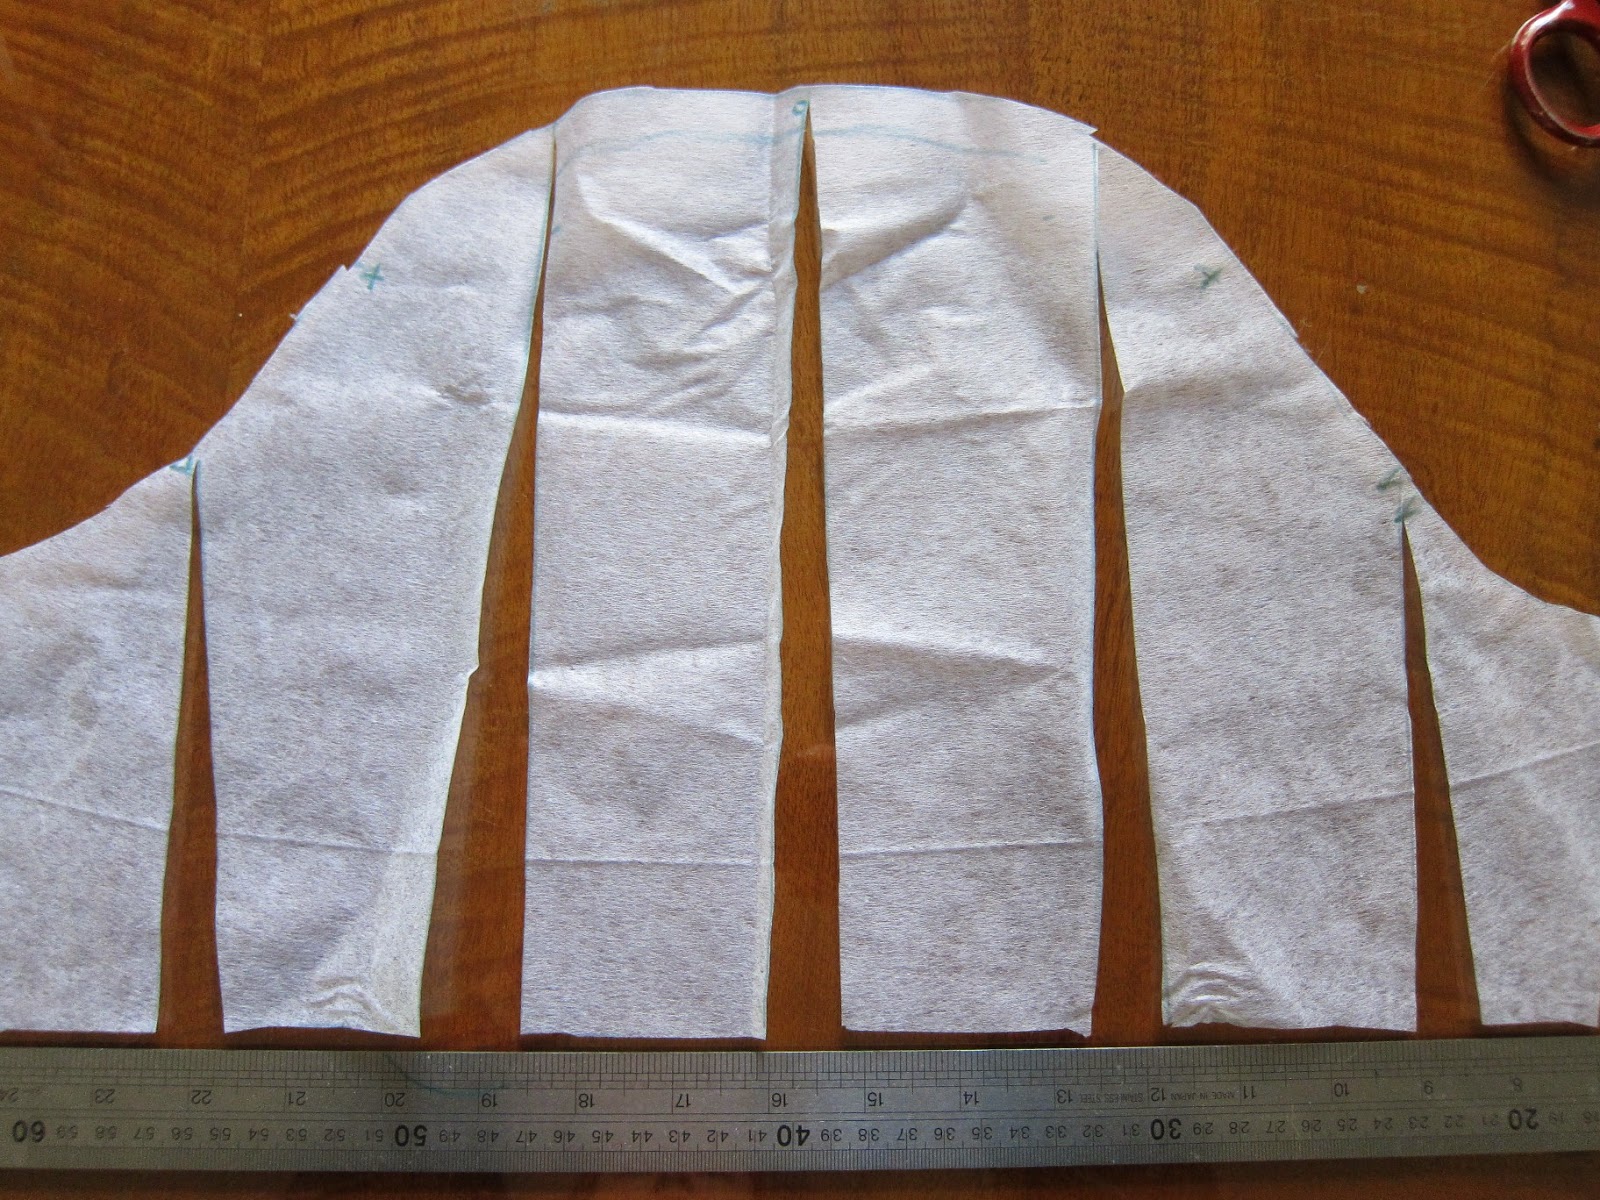
Step 1: trace out a copy of the SS sleeve onto something that you can cut - I like plain interfacing as it doesn't tear. Make sure you transfer all markings.
![]() Mark five lines top to bottom, fairly evenly apart (you don't have to be 100% accurate as the puff allows some fudging).
Mark five lines top to bottom, fairly evenly apart (you don't have to be 100% accurate as the puff allows some fudging).
Step 2: Cut the lines from the bottom of the sleeve, to the top. Don't cut through the last 2mm as you still want them to be barely attached.
![]()
Spread the slashes apart your desired distance. In my sleeves, I did 3/4 of an inch per slash, but the choice is yours.
Step 3: Trace around the outside of the pattern, and transfer the original pattern markings/notches.
![]()
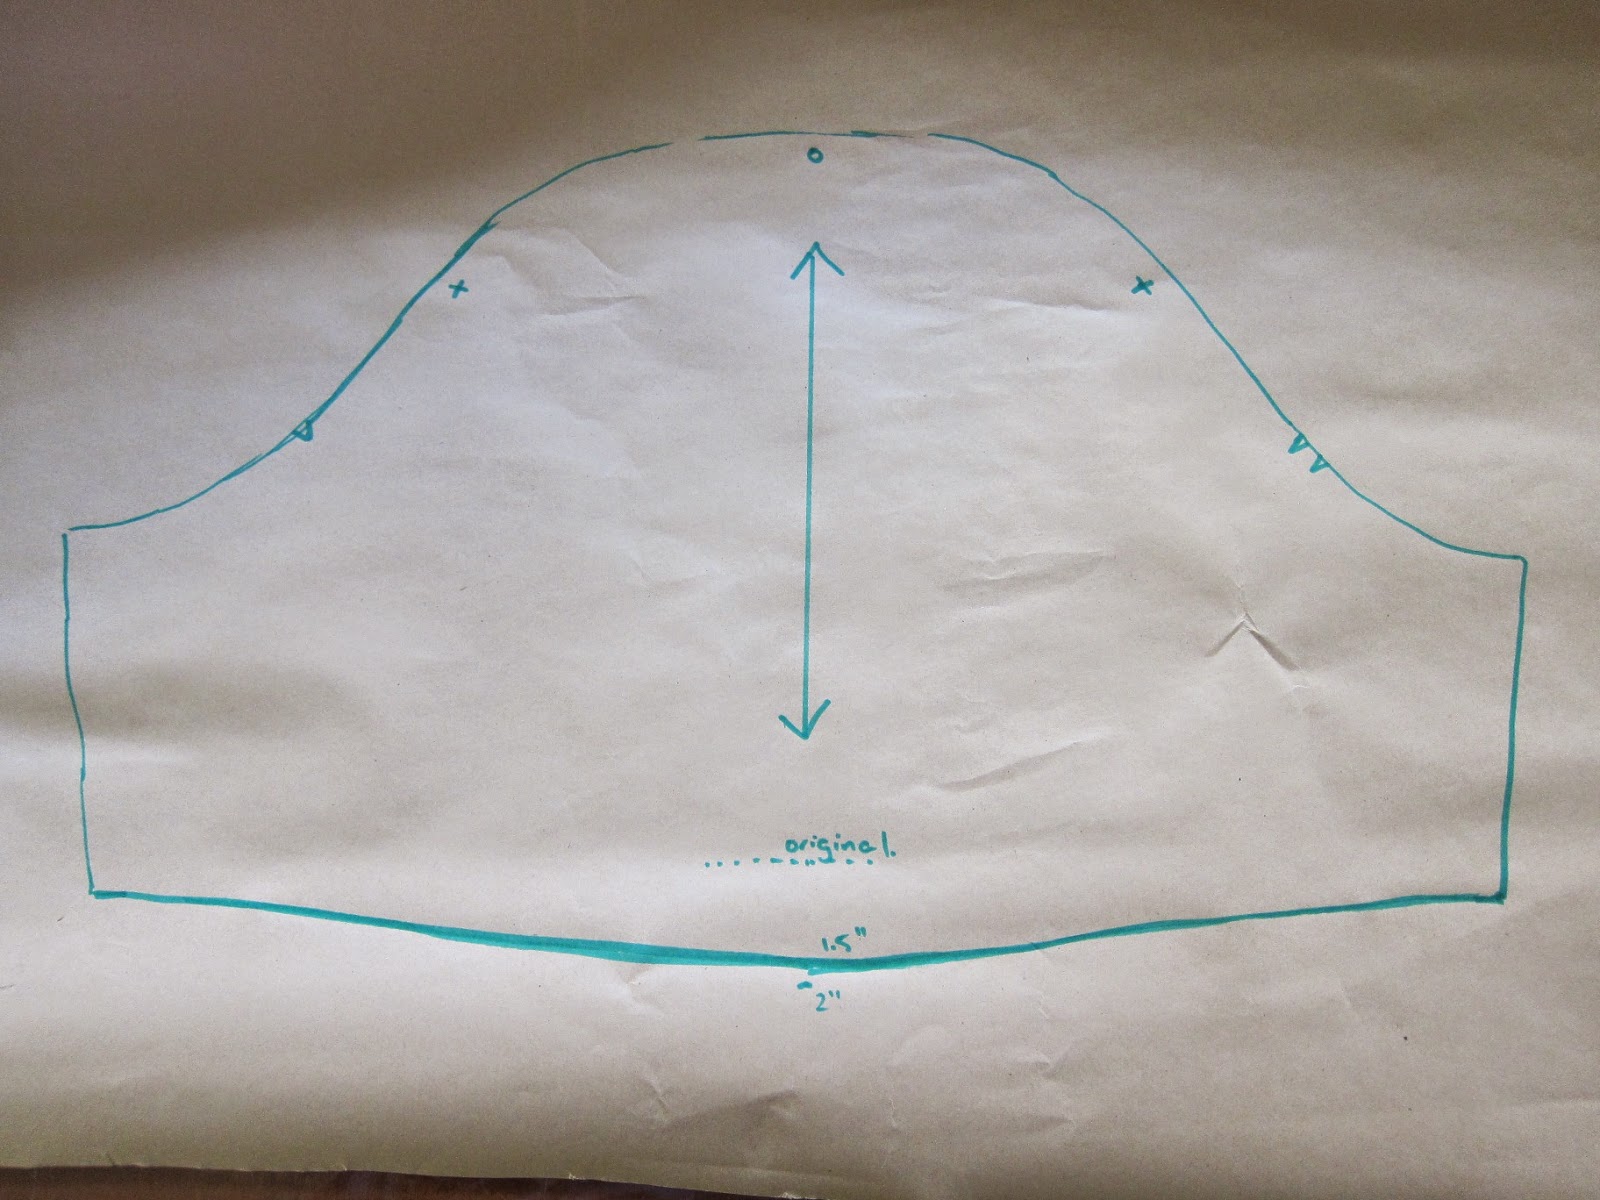
Step 4: Now you need to add a puff allowance to the bottom. If you don't add this to the centre bottom of the sleeve, they won't puff properly.
![]()
Mark a spot along the bottom in the exact centre at least 1.5 inches away from the original sleeve edge (The Design and Draping book suggests 2 inches). Carefully draw a curved line from one edge, down to the new spot, and back up to the other side.
Fold pattern down the middle to find the new straight grain line.
Step 4: Measure around your bicep for the sleeve band - make sure you add at least half an inch ease.
![]() The band will be cut on the bias then folded down the middle, so make sure you factor that in.
The band will be cut on the bias then folded down the middle, so make sure you factor that in.
I.e. I wanted a band that was 2cm high. So my finished depth was 2cm + 2cm + seam allowance on both edges = finished depth of 7cm.
My band length was 35cm + seam allowance = 38cm long.
Step 5 : Your new puff sleeve pattern is complete!
To finish the lower edge of the sleeve:
- sew the band's shorter edges together.
- sew side seams of the sleeve
- gather the lower edge of the sleeve, starting and finishing about an inch away from the side seam
- sew the band to the gathered edge (right sides together), adjusting gathers to fit nicely
- fold the seam allowance down on the other long edge, and stitch onto the wrong side of the sleeve (I like stitch-in-a-ditch here)
Done!
I hope that made sense, and if you have any questions let me know!
Coming up - Tutorial 2: An Interesting Pocket Design.
![]()

I have used the pattern a whopping ten times - so often, that I don't even blog about them anymore! It always works, looks flattering and doesn't take a lot of fabric.


But how about some changes for something interesting? Over the few weeks, I'll share some easy pattern variations I've made - including a 1940's pocket design and full length bishop sleeves.
But first - changing an existing sleeve to a full Puffy Sleeve is very easy - and I'll show you my quick and dirty way to do it!


The Smooth Sailing (SS) sleeve is gathered (puffed) at the top, and fitted around the bicep. My variation is slightly different by also being puffed around the bicep, and gathered into a sleeve band.
I'm actually following the steps here, View C from Dress Design, Draping and Flat Pattern Making by Hillhouse and Mansfield (circa 1948) - right click to embiggen in a new tab:


(I'm going to assume that you already know how to sew and are comfortable with basic pattern adjustments).
The SS sleeve already has the puffiness allowance at the top, so we only need to add it to the bottom.
Step 1: trace out a copy of the SS sleeve onto something that you can cut - I like plain interfacing as it doesn't tear. Make sure you transfer all markings.
 Mark five lines top to bottom, fairly evenly apart (you don't have to be 100% accurate as the puff allows some fudging).
Step 2: Cut the lines from the bottom of the sleeve, to the top. Don't cut through the last 2mm as you still want them to be barely attached.
Spread the slashes apart your desired distance. In my sleeves, I did 3/4 of an inch per slash, but the choice is yours.
Step 3: Trace around the outside of the pattern, and transfer the original pattern markings/notches.

Step 4: Now you need to add a puff allowance to the bottom. If you don't add this to the centre bottom of the sleeve, they won't puff properly.
Mark a spot along the bottom in the exact centre at least 1.5 inches away from the original sleeve edge (The Design and Draping book suggests 2 inches). Carefully draw a curved line from one edge, down to the new spot, and back up to the other side.
Fold pattern down the middle to find the new straight grain line.
Step 4: Measure around your bicep for the sleeve band - make sure you add at least half an inch ease.
 The band will be cut on the bias then folded down the middle, so make sure you factor that in.
I.e. I wanted a band that was 2cm high. So my finished depth was 2cm + 2cm + seam allowance on both edges = finished depth of 7cm.
My band length was 35cm + seam allowance = 38cm long.
Step 5 : Your new puff sleeve pattern is complete!
To finish the lower edge of the sleeve:
- sew the band's shorter edges together.
- sew side seams of the sleeve
- gather the lower edge of the sleeve, starting and finishing about an inch away from the side seam
- sew the band to the gathered edge (right sides together), adjusting gathers to fit nicely
- fold the seam allowance down on the other long edge, and stitch onto the wrong side of the sleeve (I like stitch-in-a-ditch here)
Done!
 |
| 1940's rayon I've been saving for this style of blouse |
Coming up - Tutorial 2: An Interesting Pocket Design.
